Bud Light and Molson Canadian might be two of the most consumed brands of beer, but drinking them is equivalent to eating McDonald’s hamburgers or reading nothing but Dan Brown.
Why settle for the lowest common denominators just because they have contrived, patriotic advertising and are easy to find?
The craft beer industry is big in Canada, and small brewers have found success selling in their local regions. For the particularly adventurous enthusiast, brewing beer at home is becoming an increasingly popular way to experiment with flavour and to learn more about the process behind beer production.
Chris Maddison, a U of T student, and Andrew Gordon, a recent alum, have spent the last few months perfecting the art of home brewing. Their latest batch is fermenting in a closet in Andrew’s Kensington Market house. That doesn’t sound too glamourous, but this batch will yield 5 gallons (19 litres) of beer.
That’s an impressive result for an investment of $40 in ingredients purchased from Toronto Brewing, a primarily online-based store that sells how-to books, equipment, starter kits, and all the ingredients required to brew.
Brewers use a large pot to boil the ingredients, a fermenter (a large bucket to hold the soon-to-be beer as it ferments), and an immersion chiller, which quickly cools down the hot “wort” (a not-so-fancy word for the liquid extracted from malted barley).
The number of steps in the process varies depending on the type of kit you buy and the ingredients you begin with, but despite the clear instructions, home brewing isn’t for those averse to risk.
[pullquote]If you’re doing things correctly, your brewing day will go something like this: you’ll assemble your ingredients (malt extract, hops, and yeast); sanitize all equipment and the space you’re using to brew; make your wort; boil the “brew water”; rehydrate the dried yeast; add malt extract and hops; shut down the boil; cool the wort; pitch the yeast; add cooled wort; and store the fermenter.[/pullquote]
A single screw-up in the process can ruin a batch, and it’s often hard to tell if a batch has been compromised until you’ve actually had a taste, typically three weeks after brewing day. Oh, and on brewing day, be prepared for a strict regimen of sanitization, some heavy lifting, and a very messy kitchen.
Chris and Andrew put down about $200 as an initial investment for equipment. Their most recent yield is equivalent to two 24-packs of beer.
While there’s a chance Chris and Andrew will make a mistake during the process and wind up with 5 gallons of really shitty beer, they’ve gained enough experience to know what they’re doing. In fact, they’ve already made it through the most arduous and risky step: brewing day.
But it took some trial and error to get to this point.
“The first batch I did was in September and it came out pretty terrible,” Andrew recalls. “It was from one of those really easy kits that’s just hops, malt extract, and sugar. It was supposed to be an IPA [India Pale Ale], which is a hoppy beer, but it just came out as something weird that didn’t taste like much.”
Brewing day requires many steps, so it’s hard to pinpoint where you went wrong if you wind up with a bad batch, especially since you won’t know if you did something wrong until you taste the beer weeks later.
“We probably screwed a bunch of things up,” Andrew explains. “I think we pitched the yeast before we put the sugar in, and you’re supposed to do it the other way around.”
But sometimes a screw-up doesn’t equal a wasted batch.
“The second batch we did, we accidentally diluted it with too much water. It still turned out really well,” Andrew says.
If you’re doing things correctly, your brewing day will go something like this: you’ll assemble your ingredients (malt extract, hops, and yeast); sanitize all equipment and the space you’re using to brew; make your wort; boil the “brew water”; rehydrate the dried yeast; add malt extract and hops; shut down the boil; cool the wort; pitch the yeast; add cooled wort; and store the fermenter.

SAM BOWMAN/THE VARSITY
Sounds a bit complicated, right? Well, it’s probably because home brewing is not a process many people are familiar with, but Chris compares it to cooking and following a recipe.
“You can get a book and learn why every step is important,” he says. “That will make you a better brewer, but anyone can go out and get a kit.”
Following a recipe is easy enough to do, but regular cooking doesn’t usually involve so much heavy lifting. Brewing day gets intense, and Chris and Andrew recommend having a brewing buddy.
“You have to time things right and it’s hectic, so it’s better to do it with another person,” Chris explains.
Patience is also a virtue on brewing day.
“You’re basically heating up three gallons of water on a kitchen stove, which takes about an hour,” Andrew says. “You have to time the addition of the hops and time how long you’re steeping the grains. It’s kind of like cooking, but you have to be really clean and it’s a lot more complicated. You also end up making a huge mess.”
After the brewing process is finished, the fermenter needs to sit in a cool place for about three weeks. The amount of time varies depending on the type of beer that’s brewing. Ales take only a few weeks while lagers require more time to ferment. Lagers also need a colder temperature to properly ferment.
According to Chris, some types of ale are more finicky than others, but they’re still what a beginner brewer should attempt first.
Bottling day is comparatively stress free, although it can be tricky too.
“You add a bit more sugar to the beer and you put it in bottles and cap it — that extra sugar is a bit more food to the yeast. Another by-product of fermentation is carbon dioxide and that’s how you naturally carbonate beer,” Chris explains, articulating the finer points of the process with the confidence of a genuine beer scientist.
“When it comes out of the fermenter, it’s flat. You put a little bit of sugar in, put it in the bottle, cap it, and then it ferments and creates carbon dioxide that gets trapped.”
Andrew explains that bottling day can get a bit sloppy too.
“The first time we bottled, we were using a funnel and measuring cup to take the beer out of the bucket and put it into bottles,” he recalls. “That took a long time and there was beer all over the floor. Then we got this thing called a bottling wand. You attach it to a siphon and then put that in the bottle, and it does it more automatically.”
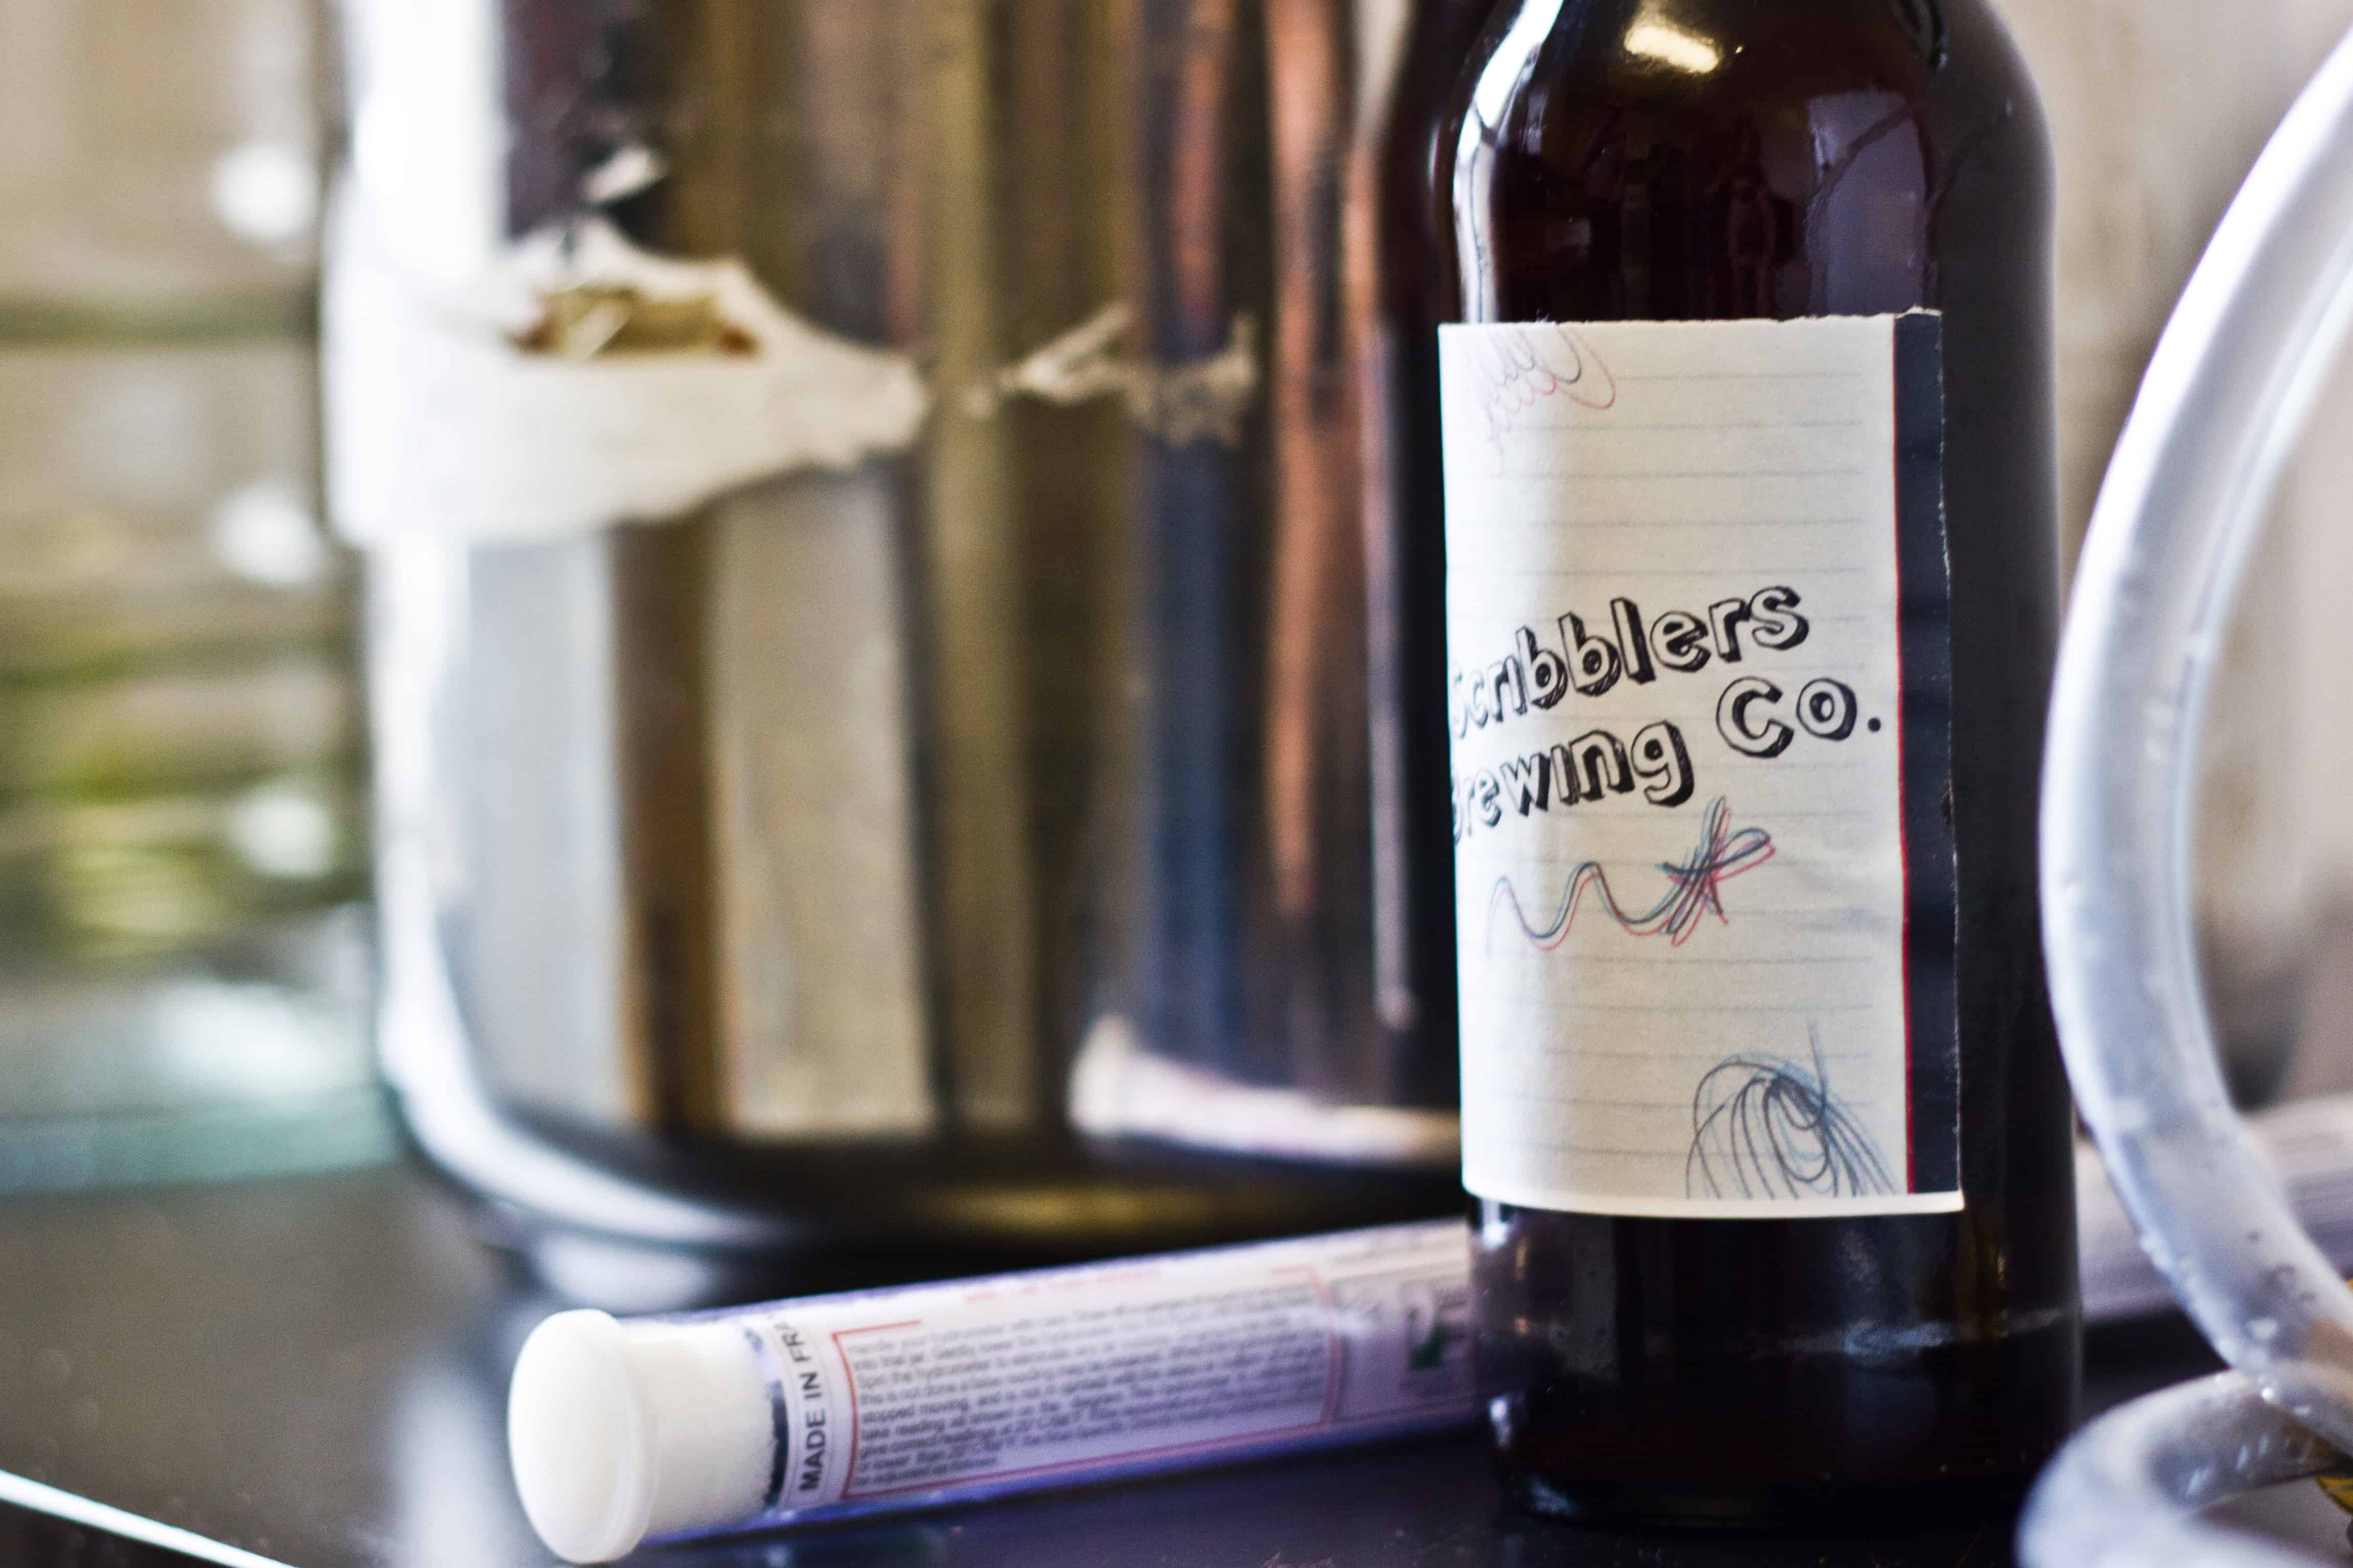
Chris and Andrew had a friend design labels for their last batch. The words “Scribbler’s Brew” are pasted on every bottle. They plan on keeping the label design for their next batches.

WYATT CLOUGH/THE VARSITY
Andrew describes his exploration of home brewing as the natural extension of being really interested in beer.
“At first, you find different beers you want to try and eventually, you start to wonder what it’s like to make it yourself,” he says.
“Before I started doing home brewing I had no idea how the different flavours were achieved, and now, I have a better idea of how that works.”
Chris’s motivation for trying home brewing stems from an interest in local industry where there’s a lot of variation.
“I think [variation is] a big part of the craft beer industry in North America,” he says. “People really feel proud of local breweries and locality is a big thing. When I go travelling now, I get excited and I look up breweries that are located in the place I’m going to go. I might tell my friends ‘I’ll pick up some beer for you,’ things you can’t get anywhere else.”
While exploring the craft beer industry will likely enhance appreciation for the beverage, home brewing takes that appreciation one step further and deepens the understanding of the creative and technical processes behind brewing. You don’t want to wind up with 19 litres of cloudy water that tastes like rotten cheese. Yes, it’s been known to happen.